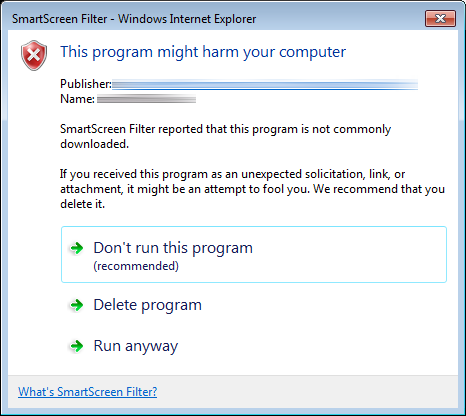
I’ve recently made a Windows installer (in the form of a WinRAR self-extracting archive) available for download to one of our clients. When testing out the download link (which is currently just secured using HTTP Basic Auth), I chose to “Run” the installer directly and was presented with Microsoft’s SmartScreen Application Reputation feature, introduced with IE9 in 2010. For an infrequently downloaded, unsigned installer package, the dialog that appears after the installer has downloaded and Windows has run its security scan looks like this:
 This is obviously fairly intimidating to the end user. To complete the download and run the installer, the user must click “Actions”, which displays a screen noting that the publisher is unknown, that SmartScreen Filter “reported that this program is not commonly downloaded and is not signed by its author” and presenting three options:
- Don’t run this program (recommended)
- Delete program
- Run anyway
The “Don’t run this program” option is selected by default. This is bespoke software, so it’s never going to be “commonly downloaded”, but is there anything we can do to make the process less user hostile? The first port of call was to obtain a code-signing certificate to use with Microsoft’s Authenticode program. The process is summarized in this MSDN blog post from 2011, but I thought it would be worth documenting the process here since the nuts and bolts of it don’t all seem to be in one place anywhere else:
1. Obtain a code-signing certificate
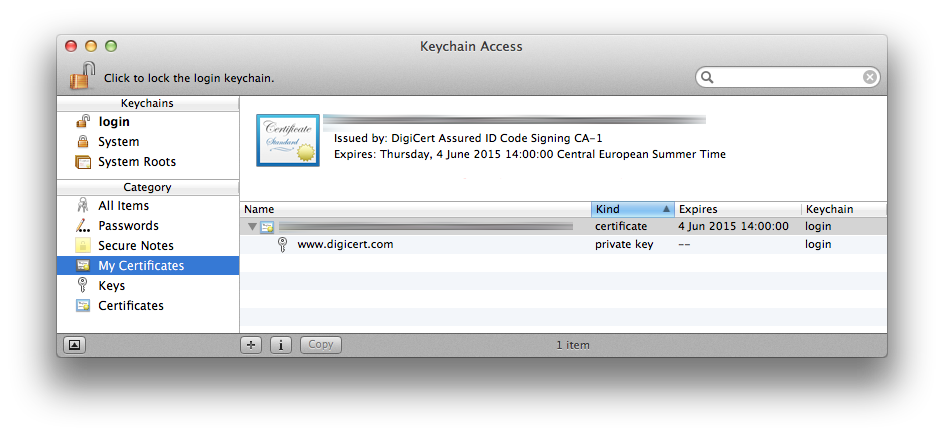
Since DigiCert were on our client’s list of approved certificate providers, we ordered a 1-year code signing certificate which, at the time of writing, cost $223. After an email asking to confirm the order and a telephone call from DigiCert to confirm contact details, DigiCert emailed through a link to create and download the certificate. Since I was downloading the certificate onto an OS X machine in Chrome, the certificate was automatically added to the login Keychain. If you downloaded the certificate using IE or Chrome in Windows, you can skip to step 3 as the certificate should already be in the Windows certificate store.
2. Export certificate to a .p12 file from Keychain Access
Select the downloaded certificate in your Keychain, ensuring that you’ve first selected the appropriate Keychain and the “My Certificates” category to the left:
Then choose File > Export Items… and save the certificate in “Personal Information Exchange (.p12)” format. After choosing the file location, you’ll be prompted to set a password for the exported certificate (and then for the Administrator password to actually export the certificate):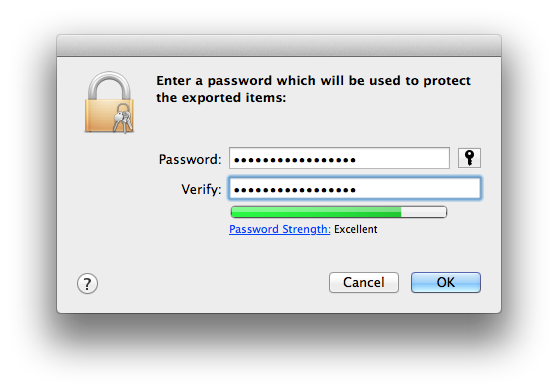
3. Install signtool in Windows
With the certificate exported to a .p12 file, it’s now time to sign your Windows executable. This is best done in Windows using Microsoft’s signtool command line utility. More information about the utility can be found over at MSDN, but you’ll first need to ensure that it’s installed. The utility is bundled with Microsoft Visual Studio 2005 or later and is included in the Microsoft Windows SDK. If you’ve gone down the route of installing the Windows SDK, you should find that signtool is installed here: C:\Program Files\Microsoft SDKs\Windows\v7.1\Bin
4. Sign the executable
Since I downloaded the certificate in OS X, the appropriate signtool incantation references the .p12 file exported in step 2:
>signtool sign

/t http://timestamp.digicert.com

/f "C:\path\to\certificate.p12"

/p password_you_set_during_p12_export

/a "C:\path\to\the\executable\you\want\to\sign.exe"
Note that the timestamp server option specified by \t is optional, but since it adds a cryptographically-verifiable timestamp to the signature, it proves that the executable was signed when the certificate was still valid, obviating the need to re-sign every signed executable at the time of certificate expiry. Each certificate authority has its own timestamp server, which you should be able to locate in their documentation.
After running the above command (without the /f and /p options if you downloaded the certificate in Windows in the first place), you should see the following at the command prompt:
Done Adding Additional Store

Successfully signed and timestamped: C:\path\to\the\executable\you\want\to\sign.exe
And that’s it. Your executable is now cryptographically signed. You can verify this in Windows, by selecting the executable in Windows Explorer, selecting File > Properties and switching to the Digital Signatures tab, under which the timestamped signature should be listed.
Conclusion
The process of signing a Windows executable with a cryptographic signature is relatively straightforward, but unfortunately this isn’t the end of the road for bespoke software providers who are trying to appear reputable to their users. Once we re-uploaded the file to our web server and downloaded it again, the only change from the end-user perspective was that the SmartScreen warning had a yellow banner in place of the red banner and the red warning “shield” from the original dialog had disappeared:

Clicking “Actions” brings up a dialog with exactly the same layout as with the unsigned executable (including a red “shield”), but the publisher is now listed and the text changes from this:
SmartScreen Filter reported that this program is not commonly downloaded and is not signed by its author.
to this:
SmartScreen Filter reported that this program is not commonly downloaded.
Both dialogs still include the text “If you received this program as an unexpected solicitation, link, or attachment, it might be an attempt to fool you. We recommend that you delete it.” and the recommended option is still “Don’t run this program”:
So the problem we’re having is now exclusively one of “reputation” from the perspective of Microsoft’s SmartScreen Application Reputation software, the workings of which are entirely opaque to us. So the next step here is to upgrade to an Extended Validation (EV) certificate and sign the installer using that. From the MSDN article:
“These certificates tend to be more expensive and harder-to-use (requiring security token hardware) but have the benefit of providing faster accumulation of reputation for SmartScreen.”
Although we don’t have the certificate just yet, DigiCert customer service have already been very good about the upgrade to an EV certificate. They credited back the $223 for our standard certificate back within a couple of hours and won’t revoke the certificate until we confirm receipt of the hardware “e-token” required for EV certificate signing. More to follow!
Update June 25th, 2014: Success with the EV certificate!
Hi Rich, have you got any news with this new EV certificate? We’re facing exactly the same issue. Nobody really knows how that “reputation” is built…
Hi Simon, I’ve just finished signing the same installer with an EV certificate and am pleased to report that all of the warnings about the program potentially harming the user’s computer and not being commonly downloaded are gone! I’ll hopefully find the time to write up a full post in the next few days, but the EV certificate has certainly been well worth the money for us.